Overview
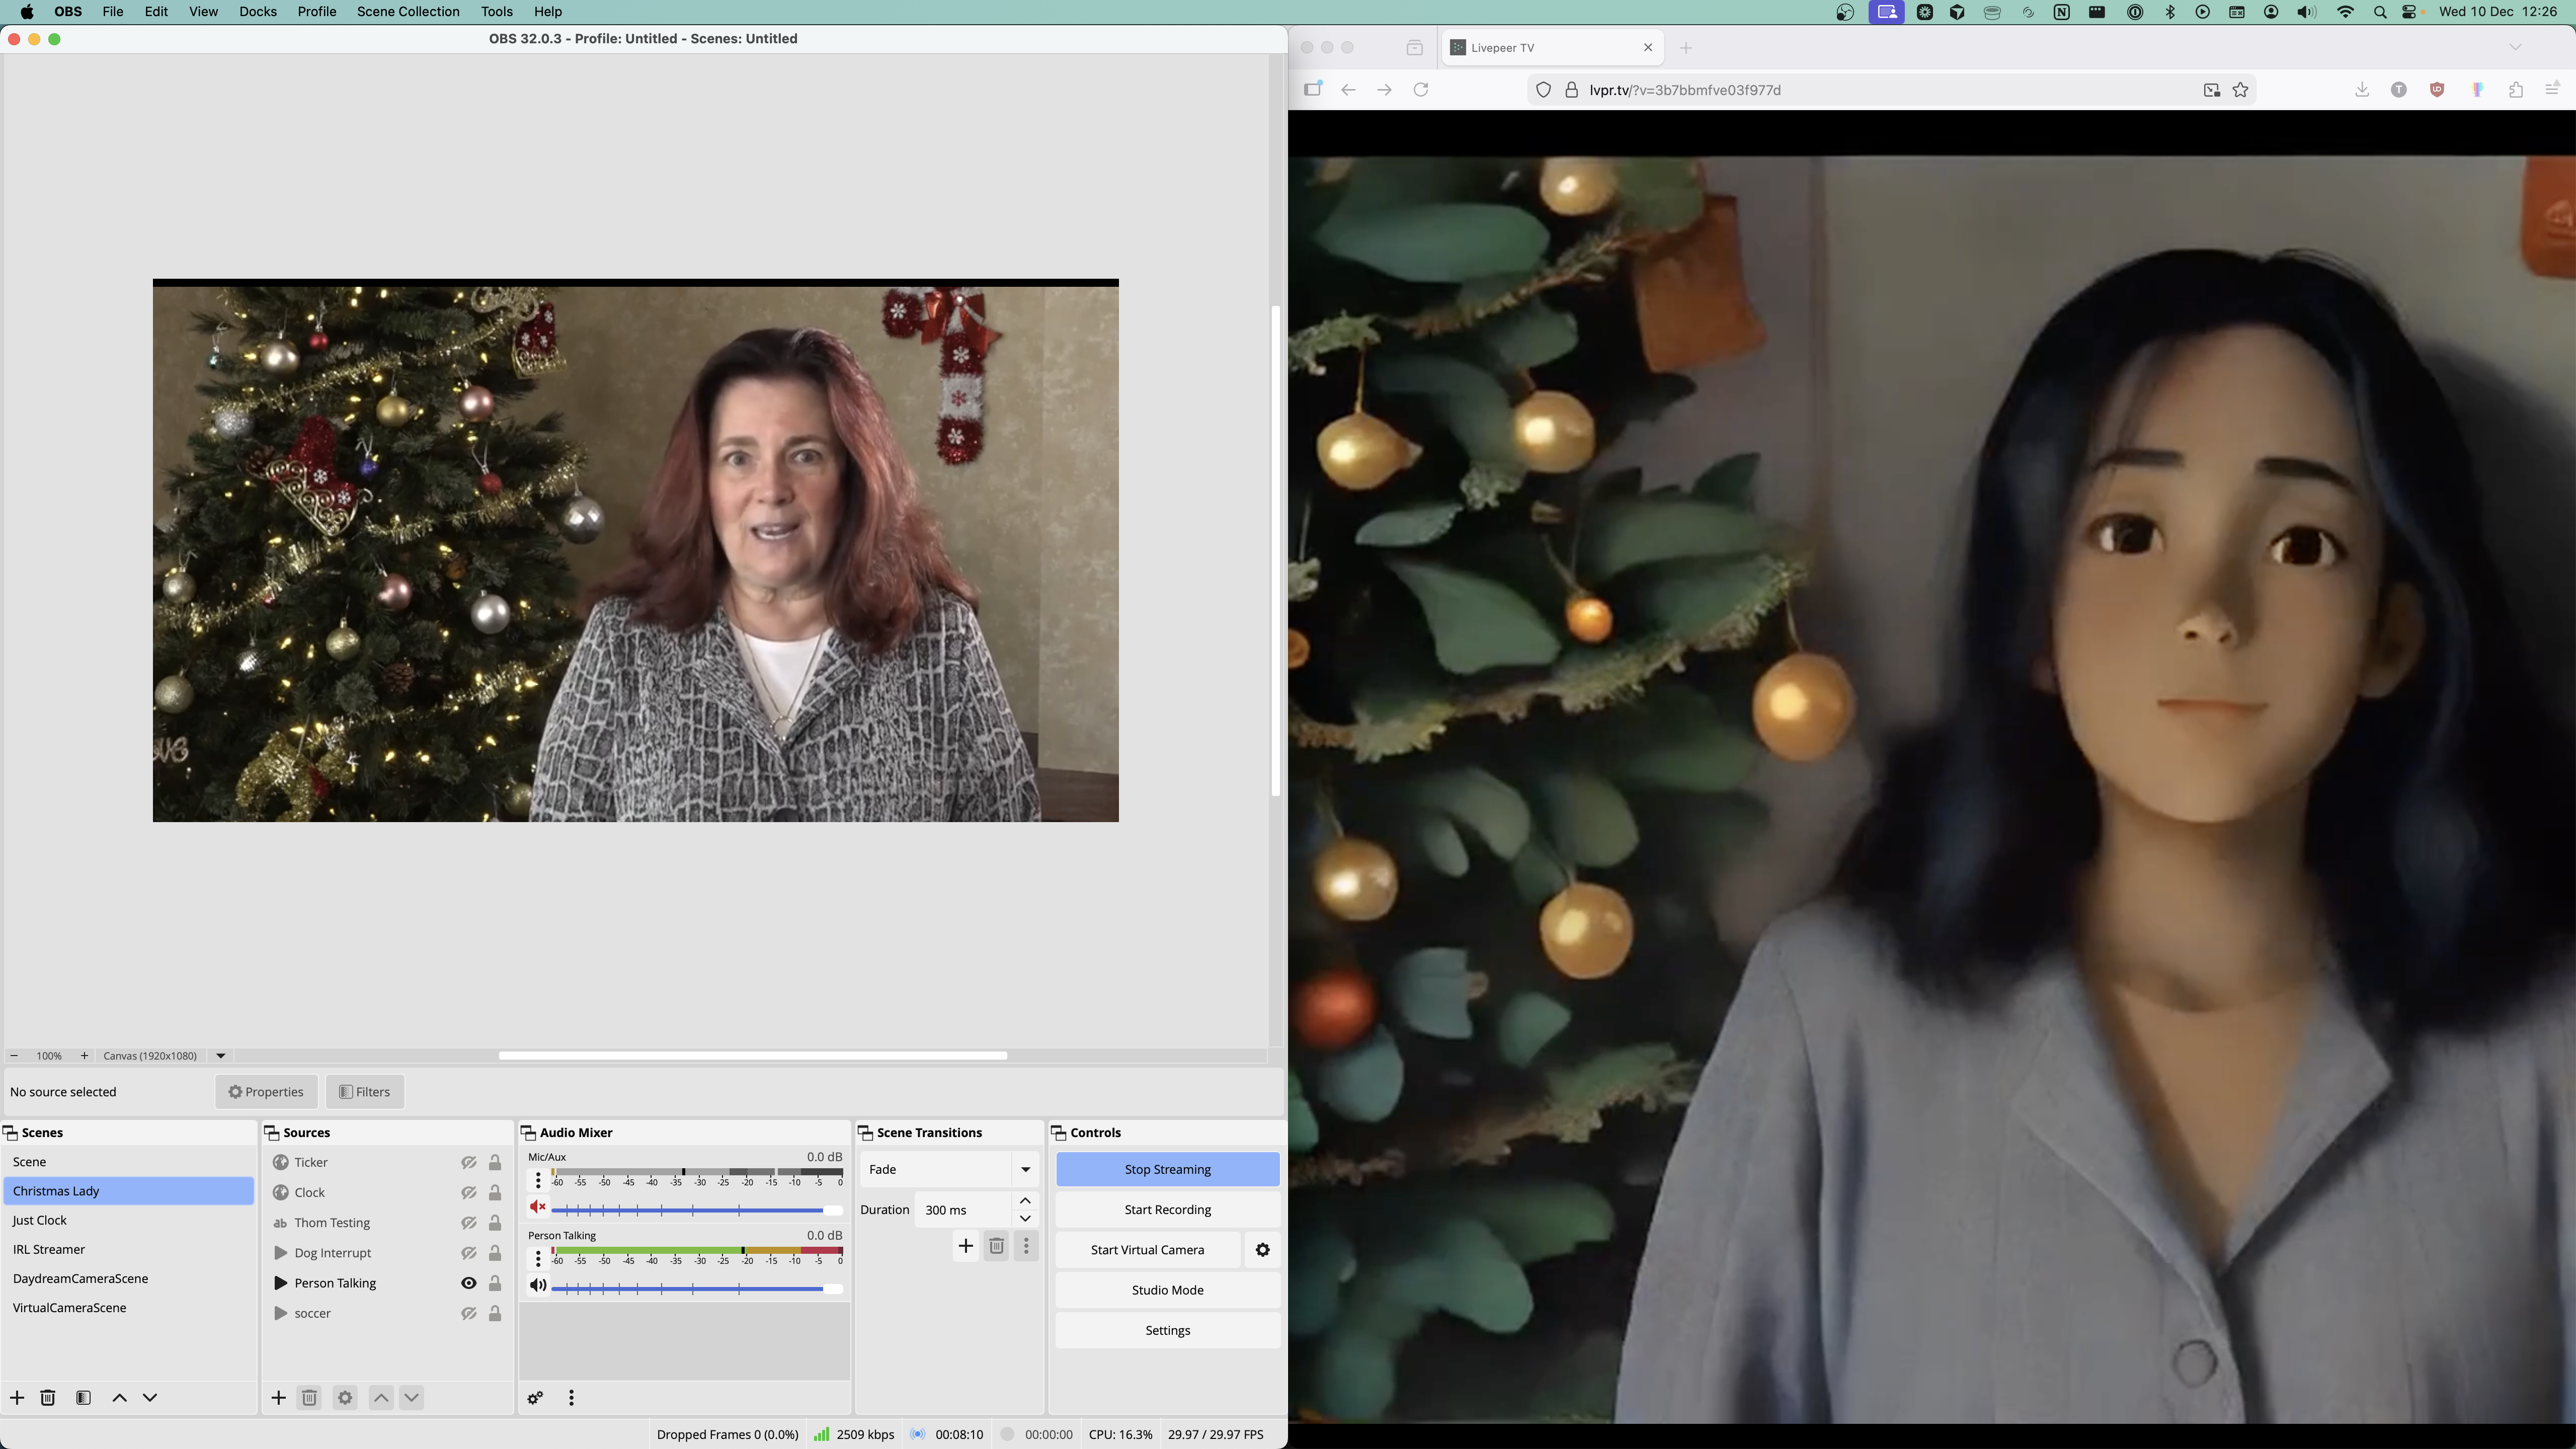
This guide will take you through the process of sending video input to our StreamDiffusion pipeline. You will learn how to adjust parameters to create a variety of visual effects, utilize live streaming and audio interactivity features, generate real-time visuals, and view the resulting output video. Our goal by the end is to have an effect that will transform a user into an anime character via their webcam.API Auth
The use of the API key is currently subsidized for a limited time, and we will provide an update on pricing in the future.
Authorization header on every request:
API Documentation
The full API reference is available in the sidebar and contains more in-depth descriptions of all parameters.Creating Your First App
Building on top of our StreamDiffusion pipeline consists of three parts:- Creating a
Streamobject - Sending in video and playing the output
- Setting StreamDiffusion parameters
1. Create a Stream
First, we need to create a ‘Stream’ object. This will provide us with an input URL (to send in video) and an output URL (to play back the modified video). A ‘Stream’ object can be reused as many times as you like, so there’s no need to create one each time you want to send it a new video input.All examples use Bash so you can copy/paste into a terminal.
Create Stream Request
We’re going to create a stream that uses the SD1.5 pipeline, which is great for cartoon effects.When specifying the pipeline_id, it also needs to match the right model_id.Ex.
pip_SD-turbo corresponds to stabilityai/sd-turboCreate Stream Response
The response contains a lot of information about the default pipeline parameters, which we’ve omitted here to make the IDs that we care about more obvious
2. Send video and play the output
Now we’ll start sending in video and view the processed output.- Install OBS.
-
Copy the
whip_urlfrom the Create Stream response. -
In OBS → Settings → Stream: choose
WHIPas the Service and paste thewhip_urlas the Server. Leave the Bearer Token blank and save the settings. -
Under the
Sourcessection, add a video source for the stream.(Ex: Video Capture Device ) -
Under the
Controlssection, selectStart Streamingto start the stream. -
Copy the
output_playback_idfrom the Create Stream response and open:https://lvpr.tv/?v=<your output_playback_id> -
You should now see your output video playing! In the next step, we’ll learn how to tweak the model parameters to make it look even better.

- Fetch playback URLs from Livepeer Studio’s Playback endpoint:
curl "https://livepeer.studio/api/playback/<your playback id>" - Choose either the HLS or WebRTC endpoint.
- Configure your chosen player with that URL.
3. Set StreamDiffusion parameters
Now that we have our basic AI streaming working, it’s time to tweak the parameters to get the anime effect that we want. We’ve included a suggested set of parameters below, but feel free to browse the Discover page to find more. Once you find one that you like, click to try it out in the Playground and then use the “Inspect Params” button in the bottom right of the screen to copy them.
PATCH to https://api.daydream.live/v1/streams/<YOUR_STREAM_ID> to update your video with the new parameters.
Here we’ve included lots of parameters for completeness, but you only need to include the parameters you want to change.
Example PATCH Request
IP Adapter Availability: IP adapters for style conditioning are only available for SD1.5 (
prompthero/openjourney-v4), SDXL (stabilityai/sdxl-turbo), and SDXL-faceid models. They are not supported by SD2.1 models like stabilityai/sd-turbo.Base64 for IP Adapter image input is also supported.
What’s Next?
Now that you have the basic creation, streaming and update flow working, you can begin to experiment with the various parameters and advanced features.Parameter change examples
Experiment with any of the parameters. A few useful ones:| Parameter | Description |
|---|---|
prompt | Guides the model toward a desired visual style or subject. |
negative_prompt | Tells the model what not to produce (e.g., discourages low quality, flat, blurry results). |
num_inference_steps | Higher values improve quality at the cost of speed/FPS. |
seed | Ensures reproducibility across runs. Change it to introduce variation. |
ControlNets
ControlNets guide image generation by providing extra structural inputs (poses, edges, depth maps, colors) that help the model interpret the input video. They impact performance differently, so experiment with which ones to enable for your use case. To enable a ControlNet, increase itsconditioning_scale:
stabilityai/sd-turbo):
thibaud/controlnet-sd21-openpose-diffusers: Body and hand pose tracking to maintain human poses in the outputthibaud/controlnet-sd21-hed-diffusers: Soft edge detection preserving smooth edges and contoursthibaud/controlnet-sd21-canny-diffusers: Sharp edge preservation with crisp outlines and detailsthibaud/controlnet-sd21-depth-diffusers: Preserves spatial depth and 3D structure of objects and facesthibaud/controlnet-sd21-color-diffusers: Color composition passthrough to maintain palette and composition
prompthero/openjourney-v4):
lllyasviel/control_v11f1p_sd15_depth: Depth-based guidance for spatial structure preservationlllyasviel/control_v11f1e_sd15_tile: Tile-based pattern control for texture preservationlllyasviel/control_v11p_sd15_canny: Canny edge detection for detailed outline preservation
stabilityai/sdxl-turbo):
xinsir/controlnet-depth-sdxl-1.0: High-resolution depth guidance for SDXL modelsxinsir/controlnet-canny-sdxl-1.0: SDXL-optimized canny edge detectionxinsir/controlnet-tile-sdxl-1.0: Tile-based control for SDXL texture generation
What’s Next?
Now that your first stream is running, explore:- Ingest Guide → learn how to publish via WebRTC or RTMP
- Delivery Outputs → learn how to deliver your stream to viewers
- Playback Options → learn how to playback your stream
- API Reference → learn how to use the API