Guiding generations with reference images and control video with VACE
VACE (Video All-in-One Creation and Editing) enables advanced video creation and editing tasks in Scope. Use reference images to define characters and styles, or control videos to guide the structure and motion of your generations.Pipeline Compatibility
VACE is supported on the following pipelines:Wan2.1 1.3B Pipelines
- LongLive
- RewardForcing
- MemFlow
Wan2.1 14B Pipeline
- Krea Realtime
StreamDiffusion V2 also has VACE capabilities, but quality is currently limited.
Supported Features
Reference-to-Video (R2V)
Use reference images to guide the character, style, and aesthetic of your generation
Video-to-Video (V2V)
Use control videos (depth, pose, scribble, optical flow) to guide the structure and motion
Animate Anything
Combine R2V + V2V: reference image defines the look, control video provides the movement
Real-time Depth
Built-in
video-depth-anything preprocessor generates depth maps from source videos automaticallyBuilt-in Preprocessors
For real-time V2V workflows, these preprocessors automatically generate control signals from your video input (webcam, screen capture, or uploaded video):| Pipeline | Description | Model Required |
|---|---|---|
video-depth-anything | Depth estimation for temporally consistent depth maps | Yes (~1GB VRAM) |
optical-flow | RAFT optical flow for motion visualization | No (torchvision) |
scribble | Contour/line art extraction | Yes |
gray | Grayscale conversion | No |
Additional preprocessors will be available via nodes in the future.
Not Yet Supported
The following features are being investigated but not currently available:- Multiple reference images for R2V
- Masked video-to-video (MV2V) for inpainting, outpainting, and video extension
- Complex tasks like Swap Anything, Reference Anything, Move Anything, Expand Anything
Enabling VACE
Before using any VACE features, make sure VACE is enabled in your pipeline settings.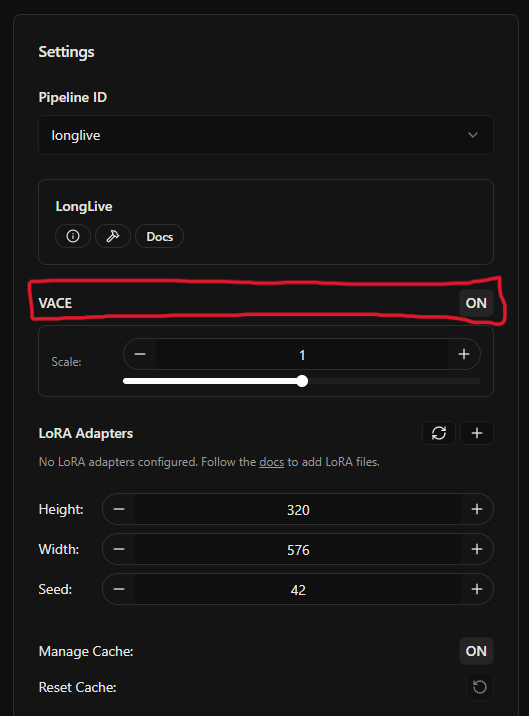
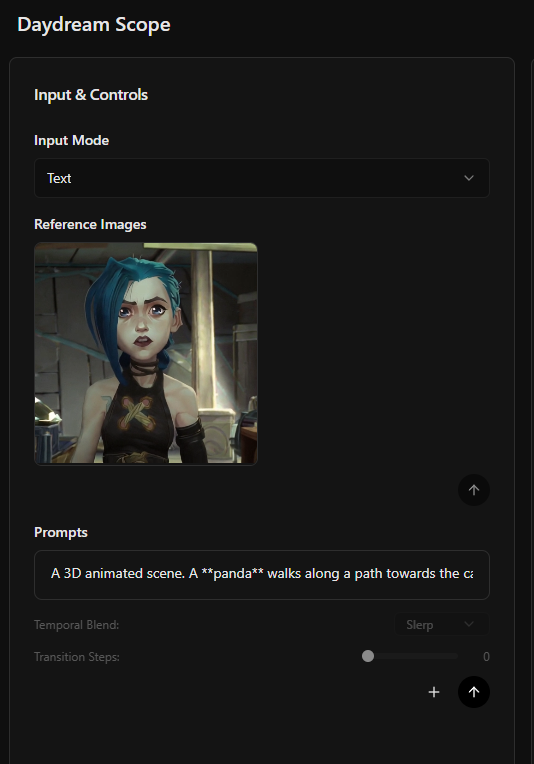
Reference-to-Video (R2V)
Use a reference image to guide the character, style, or aesthetic of your generation. The model will try to maintain consistency with the reference throughout the video.
Select your image
Use the media picker to either: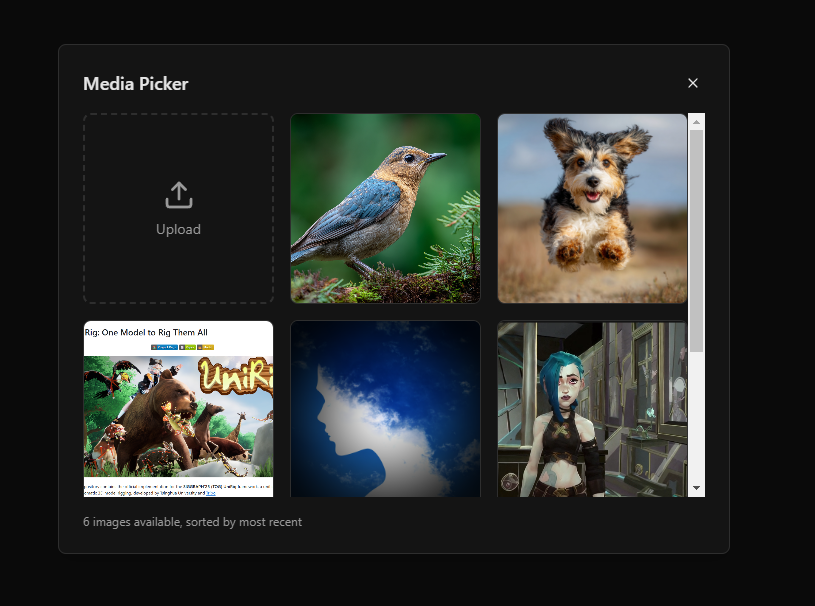
- Upload a new image
- Select from your previously uploaded assets
Only a single reference image is supported at this time. Multi-reference support is planned for a future release.
Video-to-Video (V2V)
Use a control video to guide the structure and motion of your generation. Control videos can be depth maps, pose estimations, scribbles, or optical flow visualizations.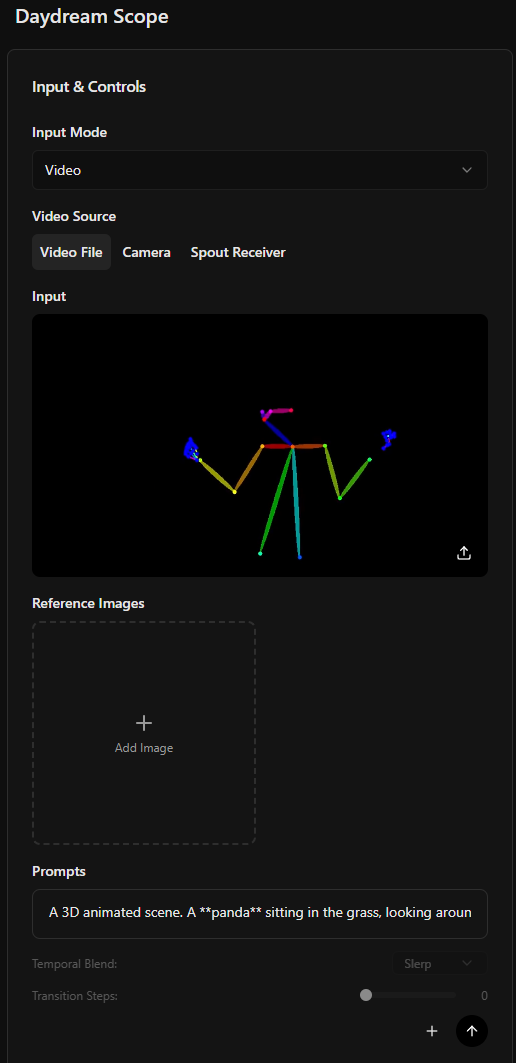
Example Control Video
A pose estimation video can be used to transfer motion to AI-generated characters:Animate Anything
Combine Reference-to-Video and Video-to-Video for the best of both worlds:- Reference image → Defines the character, style, and aesthetic
- Control video → Provides the structure and motion
Example Workflow
Example Results
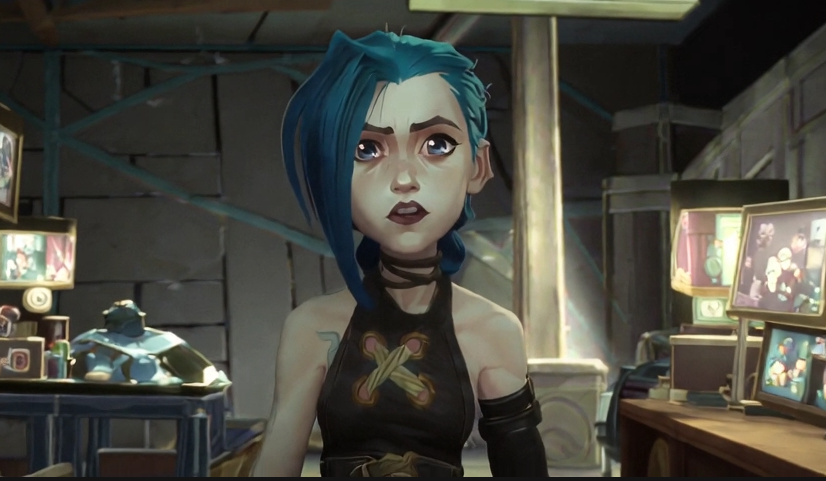
Basic Animate Anything: With LoRA enhancement: For even better character consistency, combine Animate Anything with a LoRA. This example uses the Arcane Jinx LoRA:Tips for Best Results
Reference image quality
Reference image quality
Use high-quality reference images with clear subjects. The model works best when the reference has good lighting and a clean background.
Control video resolution
Control video resolution
Match your control video resolution to your pipeline’s output resolution for best structural accuracy.
Combine with LoRAs
Combine with LoRAs
For character consistency, pair VACE with a relevant LoRA. This helps maintain style and identity across the generation.
Manage cache for long sessions
Manage cache for long sessions
If quality degrades during long sessions with Krea + VACE, try resetting the cache to restore output quality.
API Usage
For programmatic control of VACE features, see the API reference:VACE API Reference
Upload reference images, set context scale, and combine with control videos via WebRTC
See Also
LoRAs Guide
Enhance VACE with style-consistent LoRAs
Quick Start
Get Scope running if you haven’t already